

How to Steam Silky Milk and Make Latte Art With Commercial Equipment
Achieving silky milk and stunning latte art with commercial equipment hinges on mastering steam wand technique, precise temperature control, and consistent milk quality.
For any barista, whether a seasoned pro or just starting out in a bustling café, the ability to transform cold milk into a velvety canvas for beautiful latte art is a true hallmark of expertise. It's more than just a skill; it's an art form that elevates the entire coffee experience. In this comprehensive guide, we'll dive deep into the world of milk steaming and latte art, equipping you with the knowledge and practical tips to consistently produce silky milk and impress your customers with picture-perfect designs using your commercial espresso machine. We'll explore everything from the science behind microfoam to advanced pouring techniques, ensuring you gain a profound understanding of how to achieve silky milk and better latte art with commercial equipment.

Understanding the Essentials of Silky Milk
Before we even touch a steam wand, it's crucial to understand what makes milk "silky" and why it matters for latte art. The goal isn't just hot milk; it's a specific texture known as microfoam. This fine, uniform foam is characterized by tiny, almost imperceptible air bubbles suspended throughout the milk, giving it a glossy appearance and a sweet, creamy taste.
The quality of your milk plays a significant role here. Fresh, cold milk (ideally straight from the fridge) is always the best starting point. The proteins and fats in milk are key. Proteins help create and stabilize the foam, while fats contribute to the creamy mouthfeel and flavor. When you steam milk, the heat denatures the proteins, causing them to unfold and surround air bubbles, forming the stable microfoam we desire.
While dairy milk, especially whole milk, is often considered the gold standard for its protein and fat content, many non-dairy alternatives have come a long way. Oat milk, in particular, has become a favorite for its ability to produce rich, stable foam similar to dairy. Almond milk and soy milk can also work, though they often require a bit more finesse due to their differing protein structures and fat content. Experimentation is key to understanding how different milks behave with your specific commercial equipment.
The Right Commercial Equipment for Milk Steaming
Having the right tools is half the battle when learning how to achieve silky milk and better latte art with commercial equipment. Your commercial espresso machine is at the heart of this process, specifically its steam wand.
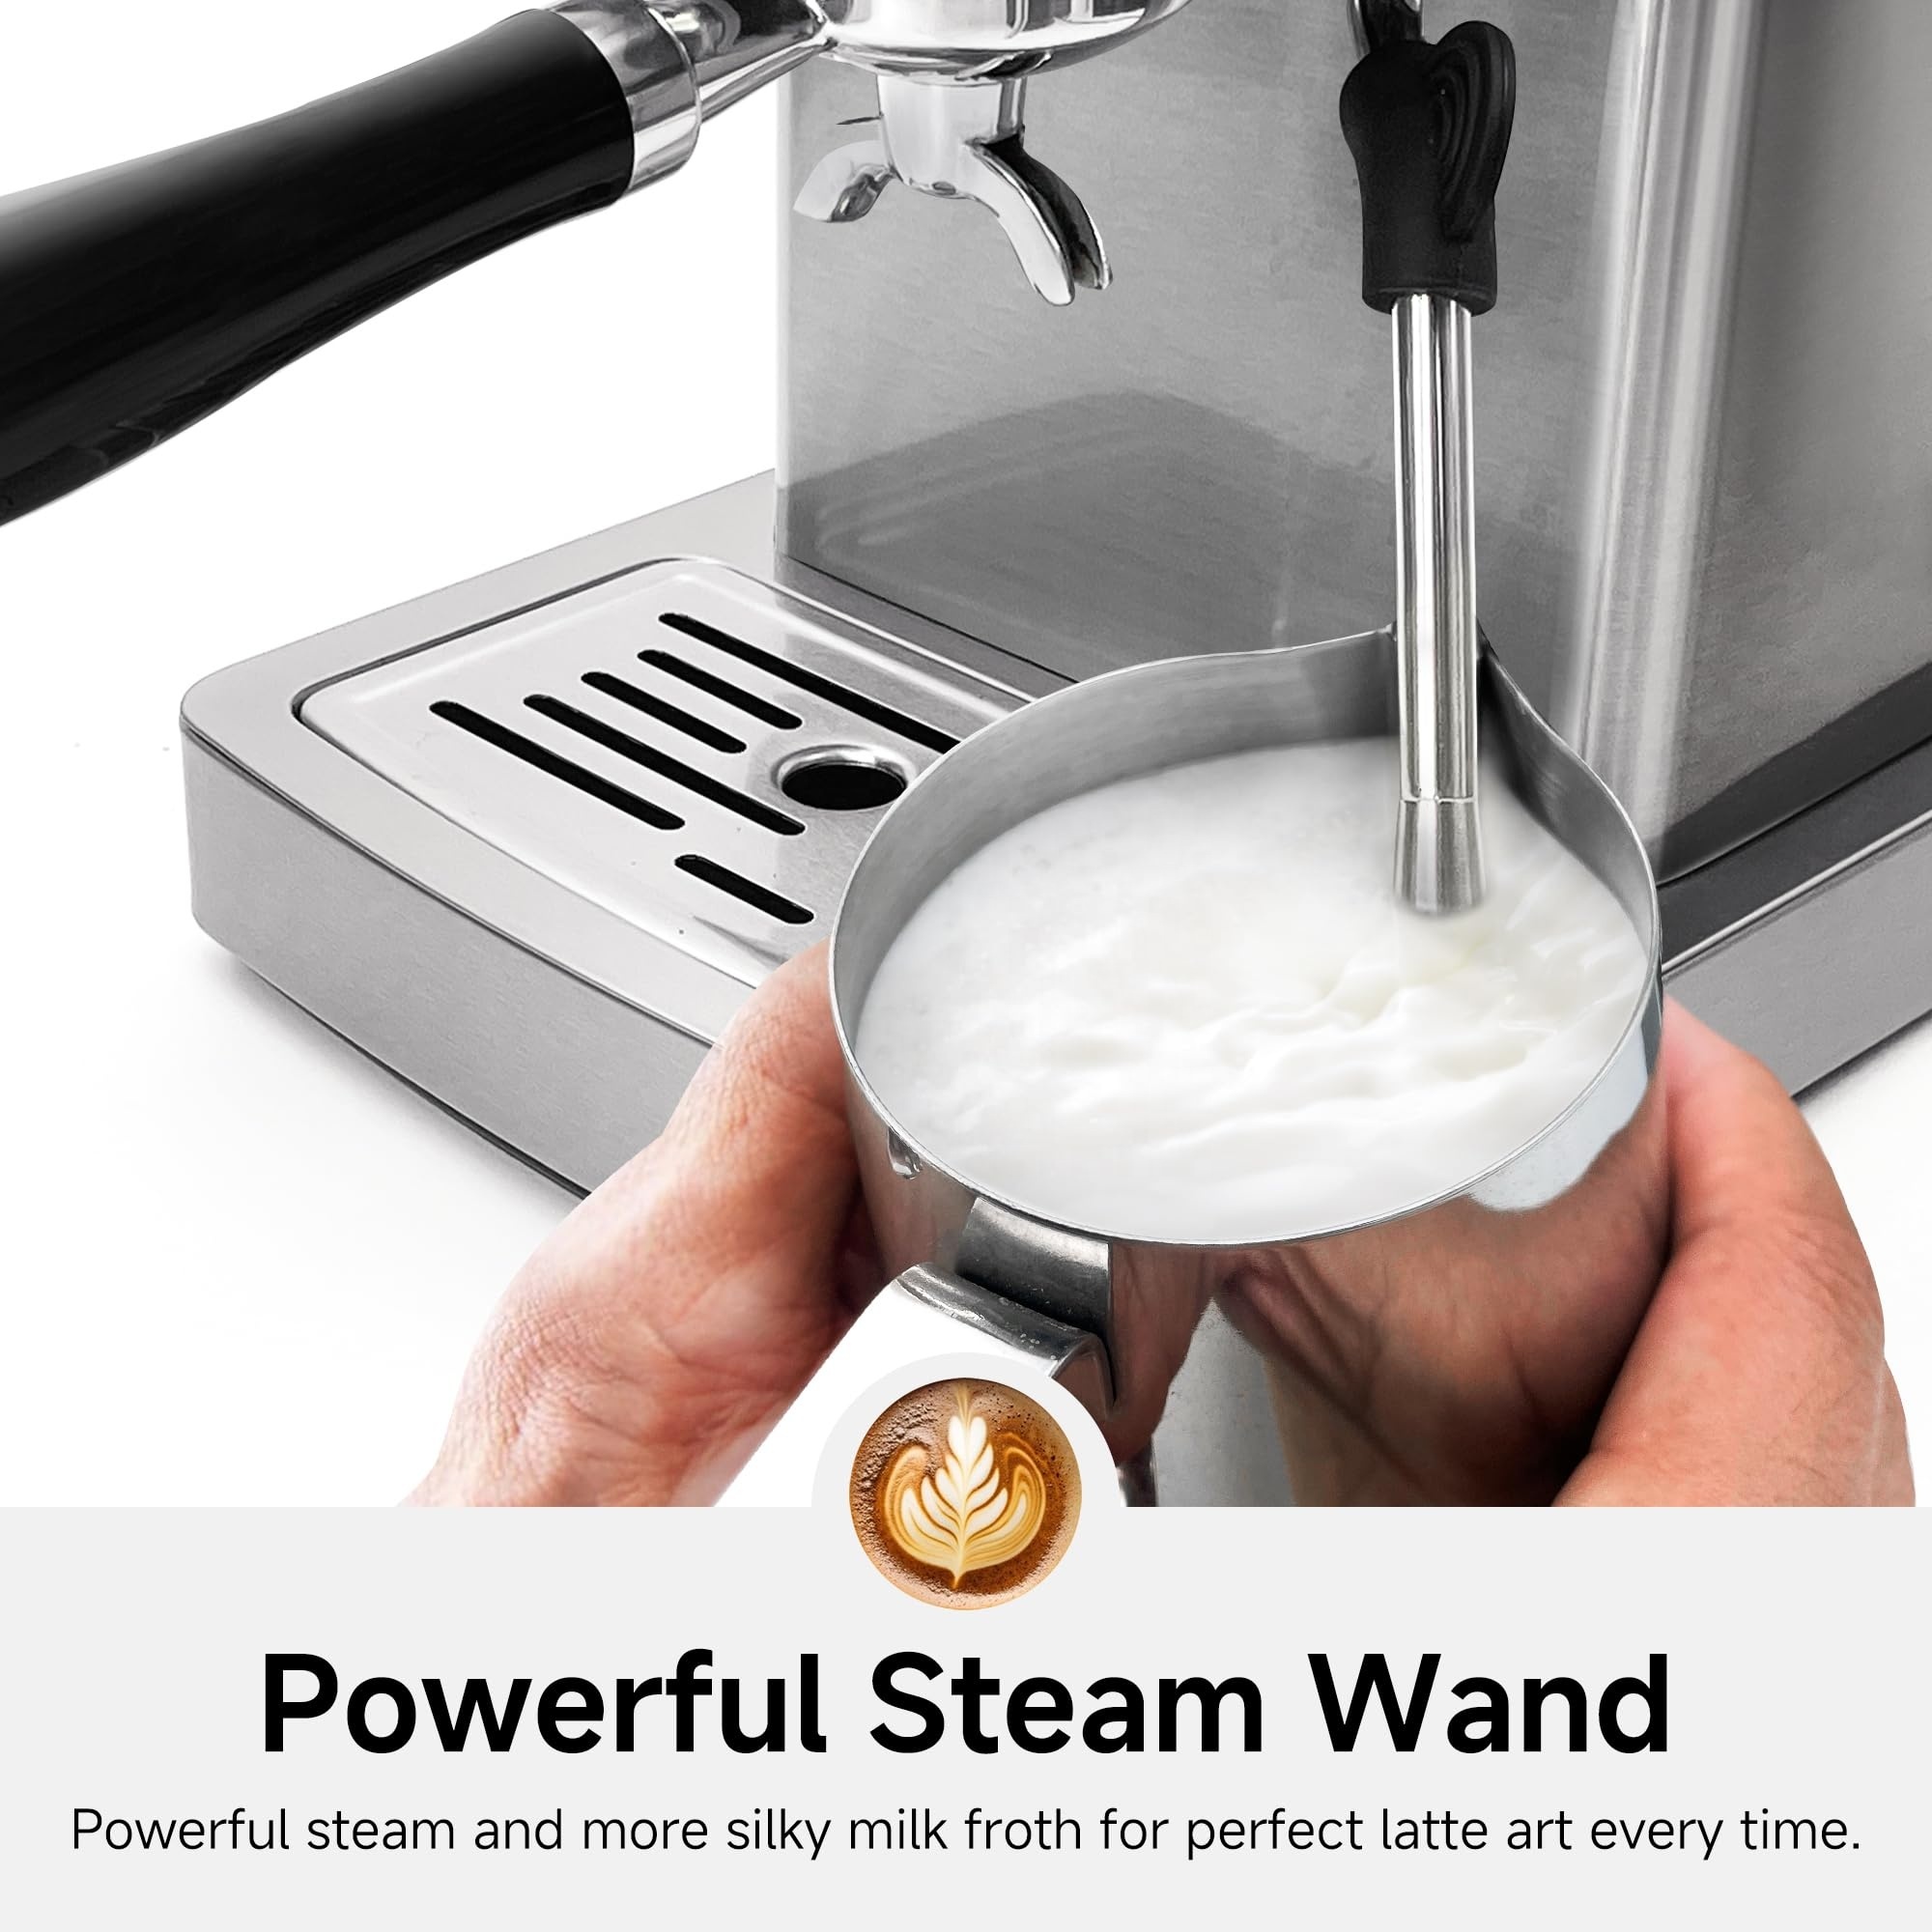
Commercial machines typically boast powerful steam wands with dedicated boilers, offering a consistent and strong steam pressure that domestic machines often lack. This power is crucial for rapidly heating and texturing milk without over-aerating it. Most commercial steam wands feature multi-hole tips (two, three, or four holes) that create a more even distribution of steam, leading to faster and more consistent microfoam development. Some machines also offer "cool touch" wands, which are insulated to prevent burns, a welcome feature during busy shifts.
The milk pitcher, often overlooked, is equally vital.
- Material: Stainless steel is the industry standard due to its durability, ease of cleaning, and excellent heat conduction, allowing you to feel the milk's temperature.
- Size: Choose a pitcher appropriate for the drink size. For a 12oz latte, a 12-20oz pitcher is ideal; never fill it more than halfway, as the milk will expand.
- Spout Design: A sharp, well-defined spout is essential for precise latte art pouring. Pitchers with rounder spouts are more challenging for intricate designs.
When I first started, I underestimated the impact of pitcher size. Trying to steam a small amount of milk in an oversized pitcher made it almost impossible to get that perfect roll. Using the correct size allows for better control and helps you achieve silky milk consistently.

Mastering the Steaming Technique: Step-by-Step Guide
This is where the magic happens and where you truly learn how to achieve silky milk and better latte art with commercial equipment. Mastering the technique takes practice, but following these steps will set you on the right path.
Preparation
- Start Cold: Always begin with fresh, cold milk straight from the refrigerator. Colder milk gives you more time to create microfoam before it overheats.
- Clean Pitcher: Ensure your milk pitcher is perfectly clean. Any residual milk can affect taste and texture.
- Fill Appropriately: Fill the pitcher just below the bottom of the spout, or about halfway. Remember, the milk will expand, and overfilling makes steaming difficult and messy.
The "Stretching" Phase (Aeration)
This is where you introduce air into the milk to create foam.
- Purge Steam Wand: Briefly open the steam valve to clear any condensed water from the wand. This prevents watery milk.
- Position the Wand: Submerge the steam wand tip just below the surface of the milk, slightly off-center.
- Open Steam: Open the steam valve fully and quickly. You should hear a soft, consistent "kissing" or "tearing paper" sound. This indicates you're introducing air correctly.
- Control Air: Keep the tip at the surface, stretching the milk for a few seconds. For a latte, you need less air than for a cappuccino. You'll see the milk volume increase. Stop stretching once the milk has increased in volume by about 20-30% or when the pitcher feels slightly warm.
My biggest mistake when learning was stretching for too long, creating stiff, bubbly foam. The key is short, controlled bursts of air right at the beginning.
The "Texturing" Phase (Incorporation/Rolling)
This phase integrates the air into the milk, transforming large bubbles into fine microfoam.
- Submerge the Tip: Once stretching is complete, submerge the steam wand tip deeper into the milk.
- Create a Whirlpool: Angle the pitcher slightly to create a strong vortex or whirlpool effect. This motion continuously folds the foamed milk back into the liquid milk, breaking down larger bubbles and creating that silky, glossy texture.
- Monitor Temperature: Keep your hand on the bottom of the pitcher. Continue texturing until the pitcher becomes too hot to comfortably hold (around 140-150°F or 60-65°C). Overheating the milk will "cook" it, resulting in a burned taste and degraded texture.
- Close Steam & Clean: Turn off the steam, then immediately wipe the steam wand with a damp cloth to prevent milk residue from drying on it. Purge the wand again to clear any milk from the inside.
Finishing Touches
- Swirl: Gently tap the pitcher on the counter to pop any remaining larger bubbles, then continuously swirl the milk. This incorporates the foam into the liquid, giving you that beautiful, glossy texture ready for pouring. The milk should look like wet paint.

Achieving Better Latte Art: Pouring Techniques
Now that you've mastered how to achieve silky milk, it's time to learn how to achieve better latte art with commercial equipment. The consistency of your microfoam is paramount; if your milk isn't silky, your latte art won't be either.
The Importance of Milk Consistency
Before pouring, ensure your milk is perfectly integrated. It should be shiny, flow easily, and have no visible large bubbles. If it looks like meringue, you've over-aerated; if it's watery, you haven't stretched enough. A perfect pour starts with perfect milk.
The "Break and Pour" Method
This is the foundational technique for all latte art.
- Integrate Espresso: Start with a freshly pulled, well-extracted espresso shot. Swirl the espresso in your cup to ensure the crema is integrated and even.
- High Pour (Break): Hold the cup at an angle (about 45 degrees). Pour the milk from a moderate height (about 4-6 inches above the cup) into the center of the espresso. This "breaks" through the crema and mixes the milk and espresso, creating a consistent base without introducing foam prematurely. Continue this pour until the cup is about two-thirds full.
- Low Pour (Art): As the cup fills, bring the pitcher closer to the cup (about 1-2 inches above) and begin to level the cup. A stream of white foam should start to appear on the surface.
Basic Latte Art Patterns
- The Heart:
- Perform the "break and pour."
- When white foam appears, tilt the cup towards you and increase the flow of milk, creating a round white circle in the center.
- Once the circle is formed, slowly raise the pitcher slightly and quickly cut through the center of the circle with a thin stream of milk, creating the point of the heart as you finish the pour.
- The Rosetta:
- Perform the "break and pour."
- Bring the pitcher close to the cup. As white foam appears, wiggle the pitcher gently from side to side while slowly moving it backward towards the back of the cup. This creates the "leaves."
- Once you have a few wiggles, raise the pitcher slightly and cut a thin stream of milk through the center of your design, similar to the heart, to form the stem.
I remember countless practice sessions, pouring endless pitchers of milk and espresso (or sometimes just water and soap for practice) to get the wiggle just right for a Rosetta. It felt frustrating at first, but with persistence, the muscle memory develops, and your designs become more consistent.
Advanced Tips for Sharper Designs
- Consistency is Key: The most important factor is consistent milk texture. Without it, even the best pouring technique will fall flat.
- Speed: Maintain a steady, confident pour. Hesitation can lead to inconsistent patterns.
- Cup Angle: Adjusting the cup angle helps control the flow and placement of your art.
- Espresso Freshness: Use fresh espresso. Stale crema can make latte art difficult to achieve.
- Practice, Practice, Practice: There's no substitute for repetition. Every pour refines your technique.

Maintenance and Hygiene for Optimal Performance
Maintaining your commercial equipment is not just about extending its lifespan; it's essential for consistently producing quality beverages and for learning how to achieve silky milk and better latte art with commercial equipment over the long run. Good hygiene directly impacts the taste of your coffee and the health of your customers.
Daily Cleaning Routines
- Steam Wand: This is paramount. After every use, wipe the steam wand immediately with a dedicated damp cloth. This prevents milk residue from drying and hardening, which can block steam holes and breed bacteria. Follow this by a quick purge of steam to clear any internal milk. A clogged steam wand dramatically reduces steam pressure and quality, making it impossible to create good microfoam.
- Milk Pitchers: Wash pitchers thoroughly with soap and water after each use. Dried milk is incredibly stubborn and can harbor bacteria that affect the flavor and texture of fresh milk.
Descaling and Deep Cleaning Schedules
- Steam Wand Soak: Periodically, your steam wand might need a deeper clean. If you notice reduced steam pressure or blockages, soak the wand tip in a specialized milk frother cleaner solution overnight, or as per the product instructions. This helps dissolve stubborn milk fats and calcium buildup. Always purge thoroughly afterward.
- Machine Descaling: Consult your espresso machine's manual for recommended descaling schedules. Limescale buildup in the boiler can affect steam pressure and boiler efficiency, impacting your ability to achieve silky milk. This typically involves using a descaling solution designed for espresso machines.
- Group Heads: While not directly related to milk, clean your group heads daily to ensure your espresso shots are perfect, as a good shot is the foundation for any latte art.
From my experience, neglecting steam wand cleaning is one of the quickest ways to ruin your milk texture and compromise taste. A clogged wand means weak, inconsistent steam, which leads to large bubbles and watery milk instead of the desired microfoam. Make cleaning a non-negotiable part of your routine.

Troubleshooting Common Milk Steaming and Latte Art Issues
Even with the best commercial equipment and technique, challenges can arise. Knowing how to troubleshoot these common problems is crucial for consistently learning how to achieve silky milk and better latte art with commercial equipment.
Flat, Lifeless Milk
- Cause: This usually means insufficient aeration (not enough "stretching") or over-aeration followed by improper texturing.
- Solution: Ensure the steam wand tip is just below the surface during the stretching phase, creating that consistent tearing sound. Only introduce air for a short period before submerging the tip for texturing. If you over-aerated, swirl the milk more vigorously to integrate the foam.
Too Many Large Bubbles
- Cause: Introducing too much air too quickly, keeping the steam wand too high on the surface, or not properly integrating the air during the texturing phase.
- Solution: Focus on a gentle, consistent "kissing" sound during stretching. Submerge the tip earlier and ensure a strong whirlpool motion to break down those larger bubbles into microfoam. Tapping the pitcher on the counter and swirling vigorously before pouring can help pop surface bubbles.
Milk Burning/Scalding
- Cause: Overheating the milk. This often happens if the texturing phase is too long or if the steam power is too low, prolonging the process.
- Solution: Pay close attention to temperature. Stop steaming when the pitcher is too hot to touch (140-150°F / 60-65°C). Commercial machines often have powerful steam, so the process should be relatively quick. If your machine's steam pressure is weak, it might be due to a clogged wand or needing a service.
Latte Art "Disappearing"
- Cause: This is almost always due to poor milk texture or an incorrect pouring technique. If the milk isn't silky and integrated, the foam will separate from the liquid espresso too quickly.
- Solution: Revisit your steaming technique to ensure you're creating true microfoam – glossy, integrated, and free of large bubbles. During the pouring phase, make sure your initial "break" pour mixes the espresso and milk effectively before you bring the pitcher close to the cup for the art. If the milk is separating, swirl it again vigorously before attempting to pour.

Frequently Asked Questions of How to Achieve Silky Milk and Better Latte Art with Commercial Equipment
What's the ideal temperature for steamed milk?
The ideal temperature for steamed milk for lattes and cappuccinos is generally between 140-150°F (60-65°C). This temperature range brings out the milk's sweetness without scalding it, which can produce an unpleasant taste.
Can I use non-dairy milk for latte art?
Yes, you absolutely can use non-dairy milk for latte art, with oat milk often being the most popular and easiest to work with due to its protein and fat content. Barista-specific non-dairy milks are formulated to steam better and create more stable microfoam.
How often should I clean my steam wand?
You should wipe your steam wand immediately after every single use with a damp cloth and then purge it to clear any internal milk residue. This prevents milk from drying and hardening, which can clog the tip and harbor bacteria.
What's the best milk pitcher size for latte art?
The best milk pitcher size depends on the drink you're making, but generally, a 12oz or 20oz stainless steel pitcher with a sharp spout is ideal for standard lattes. It's crucial not to overfill the pitcher, typically no more than halfway, to allow for proper milk expansion.
Why does my latte art disappear quickly?
Latte art often disappears quickly if the milk texture isn't properly integrated microfoam, meaning the foam separates from the liquid milk too rapidly. Ensure your steaming technique creates glossy, uniform microfoam, and your pouring technique adequately mixes the milk and espresso before the art appears.
Conclusion
Mastering how to achieve silky milk and better latte art with commercial equipment is a journey that combines science, technique, and a lot of practice. By understanding the fundamentals of milk steaming, utilizing your commercial espresso machine effectively, and perfecting your pouring techniques, you can consistently create beverages that not only taste incredible but also look stunning. Remember, every great barista started somewhere, and consistency comes from dedication and attention to detail. Keep experimenting with different milks, fine-tune your stretching and texturing, and embrace the joy of crafting beautiful coffee.
Ready to elevate your barista skills? Continue practicing these techniques daily, explore different latte art patterns, and don't hesitate to seek out fellow baristas for tips and inspiration. Share your progress in the comments below – we'd love to see your silky milk and stunning latte art creations!